Sunday 7 December 2014

They are in!

Moving, moving, moving...

My babies are tucked well in the box already. First 2 batches from 4 batches for current shipment. 


... And the fibers... Oh, dont talk about it... I know, i know... I have too much yarn and fiber.

At least i fulfilled my promise that i wont buy yarn this year.

Saturday 15 November 2014

My heaven Shawl, border to body and some modification talk

Hi All,

After 2 weeks, finally we got into picking up the stitches for the body. Before you can do that, you should bind off the border first. I chose to do stretchy bind off, as shown by my tutorial for binding off the ginkgo shawl. After that, without cutting off the yarn, just pick up the stitches as I showed on my vid below.


note on modifications:
Don't be afraid to reduce or add the numbers of repeat. I slightly discuss about how to manage the modification in my video, but I'll come up with more elaborated explanation in another post. I must run for my class today (yes... somehow saturdays and sundays is always busy for me :D).

Anyways, the key for the modification of the pattern repeat of the border lies on the adjustment when you pick up the body stitches.

That's all I can say for now ;)

Saturday 1 November 2014

Tutorial: My heaven border

Hi all... Since you are all already quite experienced... You can use almost all type of CO to start My Heaven. I personally uses long tail cast on. You can also use knitted cast on if it's easier for you.


On the straight edge, odd numbered rows, the pattern asked for yo+k2tog. The yo is actually to ease you in picking up sts later. 

Do the yo by wrapping the yarn on the needle.


And then do the k2tog.


The straight edge should look loopy like this:


Dont forget that you have to do knit garter before you start the lace chart.

Those who are first to work with double sided lacework, please consider to use lifeline on every row until you are confident to work with the pattern. You can find my tutorial for hassle free lifeline in this blog as well (http://nenengceriwis.blogspot.sg/2012/01/tutorial-hassle-free-lifeline.html)

Good luck with the border!

Sunday 21 September 2014

Tutorial: Blocking

Hi All, back again with me. After a quite difficulties in getting my things uploaded (... actually, I barely able to login to my blog :S). Internet issues... no idea where did it lie but my BIL went in and fixed it. Sometimes I still have issues, but much better than it was before.

 For blocking, you have 3 steps:
1. wash
2. pin and additional step (if needed)
3. dry and remove pins, weave in strands


 I. Wash
Basically, what I do is just to soak the finished knitting into tap water + a bit of hand soap or shampoo. For silks, I don't recommend to wash too long as it is very delicate and fragile when wet. Don't use hot water (maybe cotton is ok, but I am just too lazy to do it). After soaking for 30 minutes (10-15 mins for silk), I rinse with running water and press dry on the basin and squeeze the water out. Before I start to pin dry, I will put them in a dry towel, fold them together, and press them again to ensure all water are well squeezed out.

 II. Pin (and additional step)
Prepare you blocking mat, or mattress, or anything that you will use to pin down your shawl. Remember, it has to be big enough for your shawl. For mattress, use a towel to cover the mattress before you pin down, so that you mattress will not be wet. Shape your shawl. I usually start with the STRAIGHT edge first, and to ensure the length is correct, I use measuring tape and pin them from center outward. To make it balance, I will pin left and right in sequence. example, I pin the center, then pin 10 cm to the left, and then 10 cm to the right. Then continue with the next 10 cm and so on. You can also pin from center to right (to finish) and then center to left (to finish), by using measuring tape to ensure the sizing's correct.

 Don't forget to ensure that the center stays. Straight center is the key to a beautiful shawl :)

After I pin out the straight edge, start working with the edgings. You have 2 choices, either to start from sides to the center, or from Center to the sides. I usually pull the center first, before I start from the sides to the center. Later, if you think the center is not in the right place, you can readjust again. 

Additional steps will be needed for cotton, viscose and acrylics. After the shawl are pinned, you have to steam them. You can use iron with steam, or damp towel with non-steam iron, or a steamer. Spray some water to a thin towel and put on top of the shawl and iron. if the shawl is quite damp, just use dry towel. When you steam, ensure that you do not touch the surface of the iron/steamer onto your shawl/project.


III. Dry and remove pins, weave in strands
So, you've blocked your shawl, it dried, and you can remove the pins. I usually left my shawl for 12-24 hours. Leave it longer if it is wet outside (rainy days) or humid, or snowy. Cotton looks nicer if you leave it longer as well. Try to remove one pin first, and see if it recoils back. If it is, it means that your blocking is not enough, either you need to steam it again or repeat the whole process. I usually do the first check on the first 6-12 hours and re-pin that one pin back. Hide the strands by weaving it in into your stitches, make it perfectly hidden. And your shawl is done! You can check my blog posts where I show my shawls are being blocked on my blocking mat.

Anyways, here's the video


Sunday 7 September 2014

Ginkgo Shawlette - Knitting Surgery Example

For the first time ever, I recorded my knitting surgery in a video.

Hope this method inspire you.


Saturday 6 September 2014

Ginkgo Shawlette - penjelasan lace chart

Halu....

Ini penjelasan soal lace chartnya...

Pakai video:


Pada intinya, chart terbagi di dua bagian, yang dibelah oleh center st.

Row 1:
KANAN
K2 (edging), langsung masuk ke yarn over yang ada di chart, dan masuk ke repeat lace (p2,k, yo, k2tog, k10) dan diulang hingga 2 sts sebelum center, p2, yo, slip marker.

tengah: knit center st

KIRI (kebalikan Kanan)
yo, p2, (k10, skp, yo, k p2) repeat hingga 2 sts terakhir, yo, k2.

Row 2 (WS)
KIRI
k2, p, (k2, yo, p2, ssp, p9) repeat hingga 3 sts sebelum center, k2, p

tengah: purl center st

KANAN (kebalikan kiri)
p, k2, (p9, p2tog, p2, yo, k2) hingga 3 sts terakhir, p, k2.

Video ada di bawah...


Saturday 30 August 2014

Ginkgo shawlette - first, second, third and so on row (pictorial, bilingual)

Back again with the tutorial for the shawlette,
kembali ke tutorial membuat shawlette,

Now that we already done with the garter stitch tab, we are on to the first row.
sekarang kita sudah menyelesaikan garter stitch tab, dan kita lanjut ke baris pertama.

Basically, you have to do this pattern:
Row 3: k2 (edgings), yo, k, yo, k (center st), yo, k, yo, k2 (edgings)
I made it into: k2, yo, k, yo, put marker, k, yo, k, yo, k2.

Row 4: k2 (edgings), purl to marker, slip marker, purl to last 2 sts, k2 (edgings).


Let's start!


Wait... let me remove my breakfast...
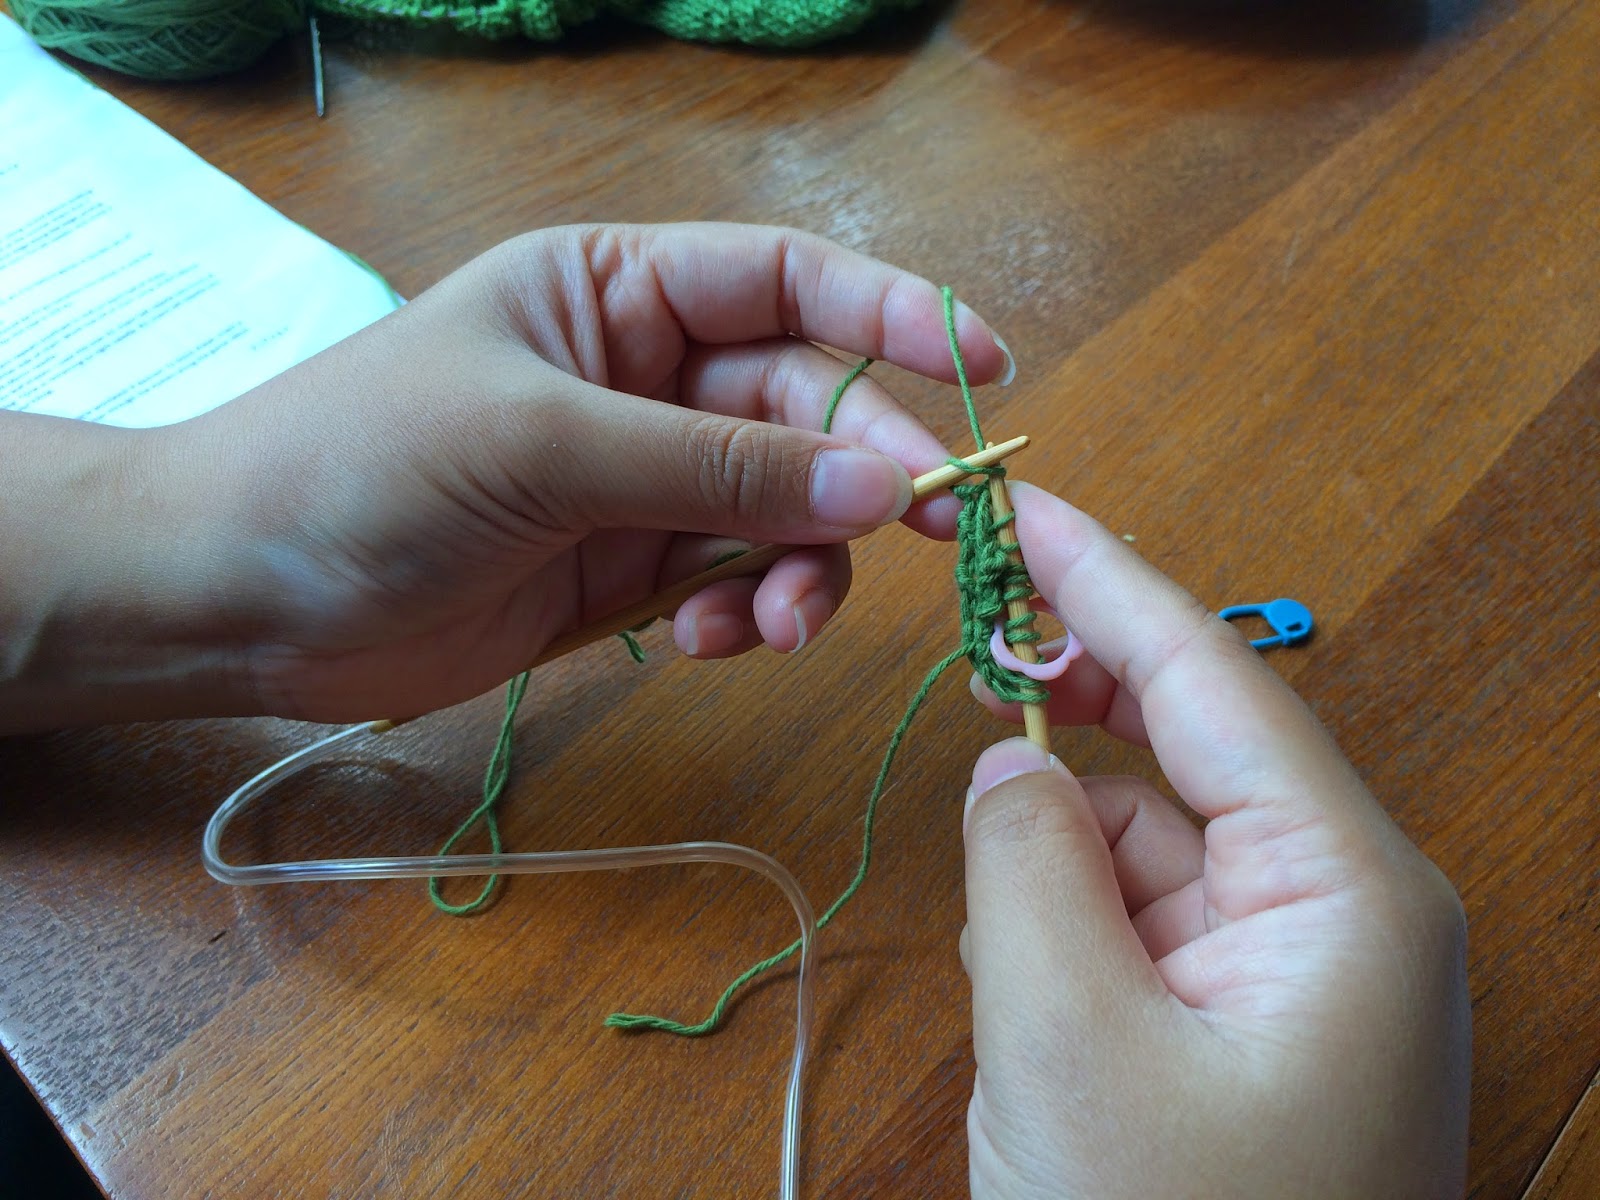

k2 the edgings.
knit kedua sts pinggiran syal


yarn over.


knit and yarn over again.


bring the marker in!
masukan cincin penanda


back to knit (center st)
kembali merajut (st tengah)


 yarn over


knit and  yarn over.


knit the 2 edging sts.
knit kedua sts pinggir.


Finish row 1!
baris pertama selesai!

Second row, knit 2 edging sts.
Baris kedua, knit kedua sts pinggiran.


Purl until you meet the marker.
purl hingga ketemu cincin penanda.


slip the marker from left to right needle
pindahkan penanda dari jarum kiri ke kanan


Back to purling, until the last 2 sts.
kembali purl hingga 2 sts tersisa di jarum kiri.


knit 2 sts of the edging sts.
Knit kedua sts dari sts pinggir. 


Finish row 2!
baris kedua selesai!


For row 3 and subsequent odd rows, always remember:
Jadi, untuk baris 3 dan ganjil seterusnya, ingat pola berikut:

k2 (edgings), yo, knit to marker, yo, slip marker, knit center st, yo, knit to last 2 sts, yo, k2 (edgings).

For row 4 and subsequent even rows, you need to:
untuk baris 4 dan genap seterusnya, anda harus:
k2 (edgings), purl to marker, slip marker, purl to 2 sts left, k2 (edgings).

This video will describe better (I speak Indonesian, but I give english caption).


- why did I use only 1 marker?
You can use as many as you wish. I put just one so that I know that I am on the right side (RS) or wrong side (WS).


Garter stitch Tab tutorial (photos) - bilingual

Hi everyone,

back again with garter stitch tutorial with photos instead of video.

First, make a slip knot
pertama-tama, buat slip knot untuk memulai


Bring both needle together, one on top of the other. And then, you pull the yarn in between both needles. Hold the other end of the yarn to keep the st still.
Pegang kedua jarum bersebelahan, yang satu ada di atas yang lainnya. Kemudian, tarik benang ke tengah antara kedua jarum. Pegang ujung lain dari benang supaya st tidak kemana-mana.


Bring the yarn to the front, and then over to the back of the top needle
bawa benang ke arah atas, lalu ke belakang jarum yang ada di atas.


Bring back the yarn to the in between of the needles.
Bawa kembali benang ke antara kedua jarum. 


Bring the yarn down to the front of the lower needle, and then to the back of the needle.
bawa benang ke arah bawah di depan jarum yang ada di bawah, lalu ke belakang jarum.


Bring back the yarn into the in between of the needles.
bawa kembali benang ke antara kedua jarum.


Bring the yarn again to circle the top needle, and bring back to the in between of the needles.
bawa kembali benang mengelilingi jarum yang atas, dan bawa kembai ke antara jarum.


Rotate the needles from left to right. See where the needles are now pointing.
Putar jarum dari arah kiri ke arah kanan. Lihat arah jarum sekarang menunjuk ke mana. 


Pull the needle that is currently positioned below from the sts, now the sts are on the cable.
Tarik jarum yang sekarang posisinya ada di bawah dan keluarkan sts dari jarum, sekarang sts ada di kabel jarum.


The pulled needle became right needle, and ready to knit.
Jarum yang tadi ditarik sekarang menjadi jarum yang di kanan, dan siap untuk merajut. 


Knit the first st.
tusuk atas (knit aja lah yah) st pertama.


Knit the second stitch.
knit st kedua.


We have finished the first row of the garter tab. Turn the work and knit again, until you complete row 7.
Sekarang kita sudah selesai mengerjakan baris pertama dari garter tab. Putar rajutan dan mulai knit kembali hingga baris ke-7.


We have finished the 7th row. Now, we have 2 sts on our right needle, and we are ready to pick up 3 sts from the garter ridges.
Sekarang kita sudah selesaikan baris ke-7. Kita punya 2 sts di jarum kanan, dan kita siap untuk membuat 3 sts baru dari pinggiran garter.


Pick up the first garter ridge with your left needle, and knit from it.
Ambil dan angkat ridge (jendolan?) garter pertama dengan menggunakan jarum kiri, lalu knit dari st tersebut.


Do the same on the second and third ridges.
Lakukan hal yang sama pada ridge/jendolan kedua dan ketiga.


Now you have 5 sts on your right needles. You are going to knit the 2 sts that is still "hanging" in the cable.
Sekarang sudah ada 5 sts di jarum kanan. Kita akan merajut 2 sts yang masih menggantung di kabel jarum.


First, pull the cable so that the sts on the cable moved onto the left needle.
Pertama-tama, tarik kabel jarum sehingga 2 sts yang menggantung di kabel tersebut pindah ke atas jarum kiri.


Knit the sts on the left needle.
Rajut kedua sts di jarum kiri.


And now you have 7 sts on your right needle.
Sekarang sudah ada 7 sts di jarum kanan. 


This garter tab later will knitted and it's the garter tab just above the two lace hole pair on the below shawl.
Garter tab akan menjadi garter tab yang terletak tepat di atas sepasang lubang lace di shawl bawah ini. 


It looks just straight enough and you can't barely see the start of the tab.
Tab terlihat lurus dan titik awal dari tab nyaris tidak bisa dibedakan. 
 
Template by suckmylolly.com